

Your Cassette Tapes Are 40 Years Old Now. Here’s How to Take Care of Them
Cassette tapes were never supposed to become precious artifacts. We tossed them into cars, backpacks, shoeboxes, and cheap plastic cases. Forty years later, a surprising number are still here. Here’s how to inspect, play, clean, store, and preserve them.
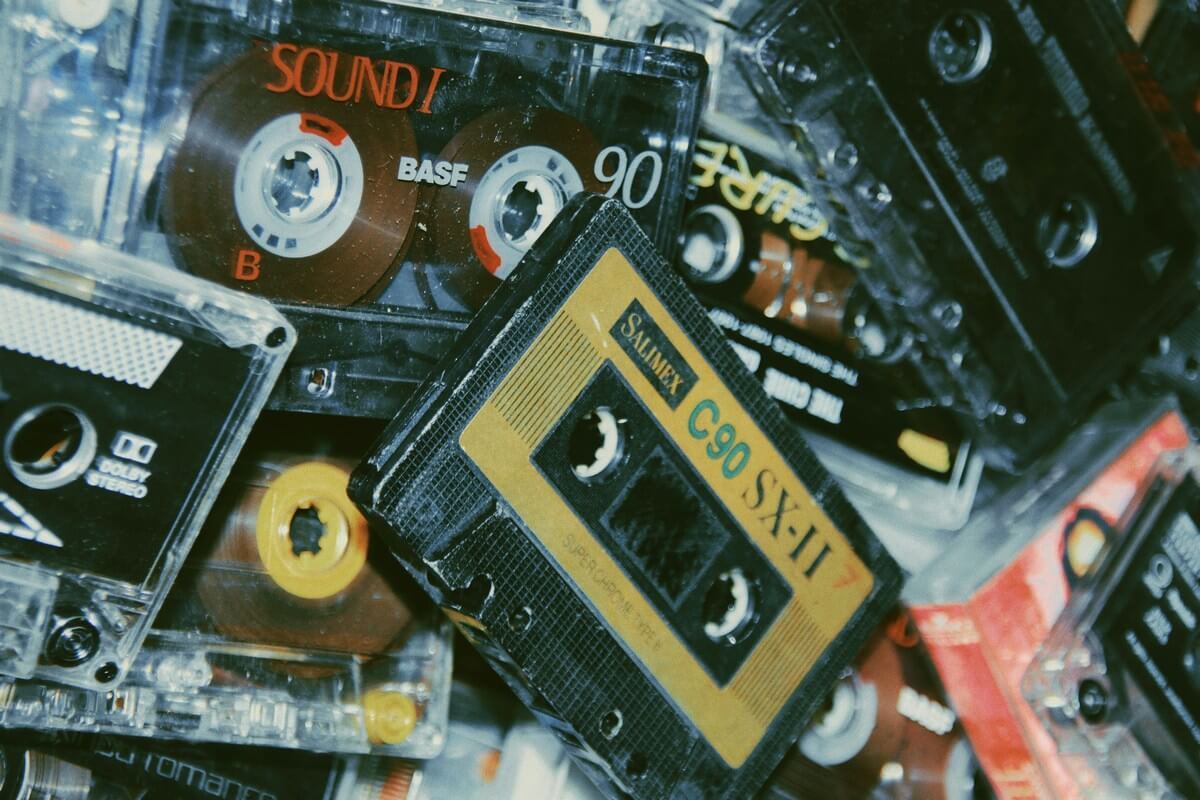
I pull a cassette from a box I haven't opened in years.
The handwriting on the label is mine. The plastic case is scratched. The J-card is slightly faded. I remember making tapes like this, although I definitely did not spend much time wondering how they would hold up four decades later.
Back then, cassettes were simply what we owned.
They went into cars. Backpacks. Bedrooms. Plastic storage racks. Shoeboxes. Glove compartments that reached approximately the temperature of the sun every July.
Nobody handed me a preservation manual.
And somehow, a lot of those tapes are still here.
Which raises a question I never expected to ask:
Is putting this thing into a cassette deck after forty years a perfectly reasonable idea, or a very efficient way to turn a childhood memory into six feet of magnetic spaghetti?
The answer is: probably reasonable.
But I'd check a few things first.
Cassette tapes can survive for decades when they're stored reasonably well and played on properly functioning equipment. The magnetic recording itself does not simply evaporate because a tape has reached a certain birthday. IASA notes that properly produced, stored, and handled magnetic recordings can remain magnetically stable for historically meaningful periods.
The bigger complications are mechanical and chemical.
A cassette is not just a piece of plastic containing music. Inside that shell is very thin magnetic tape, two hubs, guides, slip sheets or similar low-friction components, often a pressure pad, leaders, splices, and a surprisingly delicate little transportation system.
Then we put that miniature machine inside another aging machine and ask them to cooperate.
What could possibly go wrong?
Quite a lot, actually.
Fortunately, you do not need to become an audiovisual archivist to take reasonable care of a cassette collection.
You mostly need to keep the tapes somewhere sensible, inspect questionable ones before playing them, keep your cassette deck healthy, and know when to stop pressing buttons.
First: the tape and the cassette are not the same thing
This distinction matters.
The cassette is the plastic cartridge.
The tape is the thin magnetic recording medium wound inside it.
A cassette can fail while the tape itself remains perfectly recoverable.
The shell can:
- crack;
- warp;
- separate;
- lose its pressure pad;
- develop damaged guides;
- bind against the reels;
- have degraded slip sheets;
- suffer a broken leader or splice.
The Canadian Conservation Institute specifically warns that cracked housings and missing pressure pads can make a cassette unsafe to play, potentially damaging both the tape and the playback machine.
The reverse can happen too.
A cassette may look beautiful from the outside while the tape inside is contaminated, poorly wound, damaged, or chemically deteriorated.
So when I'm deciding whether an old cassette is safe to play, I'm looking at both.
Cassettes are machines inside machines
A vinyl record mostly sits there while a stylus traces its groove.
A CD spins while a laser reads it without touching the recorded surface.
A cassette has considerably more going on.
During playback, the tape has to:
- unwind smoothly from one hub;
- pass through the shell;
- move across the playback head;
- travel between the capstan and pinch roller;
- remain properly tensioned;
- stay aligned;
- wind neatly onto the other hub.
In a standard compact cassette, the tape travels at 1⅞ inches per second. The deck's capstan provides precise speed control, while the pinch roller presses the tape against the capstan so it moves consistently. The take-up hub gathers the tape as it passes through.
Meanwhile, the playback head reads tiny magnetic patterns stored in the coating on the tape and converts them back into an electrical audio signal.
The cassette therefore depends on the tape and the transport mechanism behaving properly.
That is why cassette care cannot stop at the cassette.
A bad tape deck can destroy a perfectly good tape.
What's actually on cassette tape?
At the simplest level, most cassette tape has a thin plastic base film coated with magnetic particles held in place by a binder.
IASA describes magnetic tape as having two primary layers: a base film and a magnetic layer; some formulations may include additional coatings or backing materials.
The binder is important because it keeps those magnetic particles attached to the plastic base.
When recording, an electromagnetic recording head creates changing magnetic fields that correspond to the audio signal. Those changes become encoded in the tape's magnetic layer. During playback, the process runs in reverse: the playback head senses those magnetic patterns and converts them back into an electrical signal.
This is why dirt, friction, damaged tape surfaces, bad alignment, chemical deterioration, and strong magnetic fields can matter.
You do not need to know much more physics than that to understand the rest of cassette care.
Before I play an old cassette
This is the habit I wish we'd all had when cassettes were new.
Before putting an older tape into a machine, I spend maybe thirty seconds looking at it.
Not performing forensic science.
Just looking.
Check the shell
I look for:
- cracks;
- warping;
- separated seams;
- loose screws;
- missing chunks;
- labels peeling far enough to interfere with the deck.
If the shell is visibly distorted, I don't play it.
CCI notes that damaged shells can cause the tape to bind and may require moving the tape into a replacement shell before playback.
Check the pressure pad
Look through the exposed opening along the bottom edge of the cassette.
On many cassettes, you'll see a tiny felt-like pad mounted on a small metal spring.
That thing suddenly matters.
More on it in a moment.
Look at the exposed tape
Check for:
- wrinkles;
- folds;
- creases;
- visible dirt;
- unusual deposits;
- fuzzy growth;
- tape hanging loosely outside the shell.
Don't touch the tape unless you absolutely need to. The Library of Congress recommends handling audio cassettes by the shell rather than touching their internal components or recorded surfaces.
Look through the window at the tape pack
The wound tape should generally look flat and even.
What I don't want to see is a tape pack that resembles a tiny brown staircase.
IASA specifically warns against stepped or uneven tape packs because they can deform the edges of the tape.
CCI also recommends watching for tape that appears too loose, too tight, coned, or has strands protruding from the pack. Those are warning signs that playback may not go smoothly.
Check the hubs
Make sure nothing looks obviously jammed or crooked.
A little slack does not automatically mean disaster.
But if I gently turn a hub and encounter real resistance, I stop.
A forty-year-old cassette is not the place for a test of upper-body strength.
Check for moisture damage or mold
Visible fuzzy growth, spotting, obvious water damage, or a strong musty odor deserve special attention.
Don't deliberately stick your nose into a moldy cassette.
You already know what mold smells like. No field test required.
If the tape appears moldy, set it apart from the rest of the collection and do not play it.
We'll get to that too.
The pressure pad: that tiny thing you never noticed until now
Most people who casually used cassettes probably never thought about the pressure pad.
Why would we?
The tape went in. Music came out. Occasionally the car stereo ate it and ruined an otherwise perfectly good afternoon.
Inside many cassette shells, a small felt pad sits behind the section of tape that passes across the playback head.
Its job is to help keep the tape in proper contact with the head.
Over time, the adhesive or mounting material can fail. The pad can become crooked, deteriorated, or fall off entirely.
If your cassette has a missing pad and your deck depends on that pad for tape-to-head contact, playback can be poor or unreliable.
CCI recommends reshelling a cassette when its required pressure pad is decayed or missing. It also notes an interesting exception: some cassette decks, including certain Nakamichi designs, mechanically move the cassette's pressure pad out of the way and control tape tension themselves.
So the universal rule is not simply:
No pad = dead cassette.
The better rule is:
If the pad is missing or falling apart, don't assume the cassette is ready to play.
Replacement pressure pads are available, and experienced hobbyists do repair them.
For an ordinary commercial cassette, that may be a perfectly reasonable small project.
For the only surviving recording of your father's band from 1987?
I would set the tiny bottle of glue down and consider professional help.
Should I rewind an old cassette before playing it?
This is where cassette folklore gets messy.
You've probably heard some version of:
Always fast-forward and rewind an old tape before playing it.
That advice is not completely invented.
But it is also not a universal commandment.
CCI's digitization guidance says a fast-forward and rewind can be useful if the tape is not fragile, both to relieve stresses and to test the end splice before playback. It also says to skip that step if the cassette is already misbehaving.
Separately, CCI's preservation FAQ gives a more conservative principle for stored magnetic tape: if the wind already looks good and storage conditions have been reasonable, it is generally better to leave the tape alone instead of routinely rewinding it for no reason.
Those aren't really contradictory.
The practical takeaway is:
For a normal commercial cassette in good condition
If the tape pack looks fine and the cassette behaves normally, you do not need to perform a ceremonial rewind every time you rediscover it.
For a cassette with a poor or suspicious tape pack
A controlled full-length wind may help restore a better pack, but use a known-good machine and monitor the cassette closely.
For a fragile, squealing, binding, moldy, or irreplaceable cassette
Don't start aggressively fast-winding it because somebody on the internet said old tapes need exercise.
Every trip through a transport system introduces mechanical stress.
Sometimes doing nothing is the more sophisticated maintenance procedure.
The pencil trick is real. Just don't get ambitious.
Yes.
The pencil.
For anyone young enough not to have experienced this particular technological marvel, certain pencils and pens fit nicely into cassette hubs and can be used to rotate the reel manually.
We really did have entertainment technology that occasionally required office supplies.
And yes, gently turning a cassette hub manually can still be useful.
CCI even mentions using a pencil to cautiously evaluate the tension of a badly packed cassette before attempting playback or reshelling.
The operative word is gently.
A pencil can help:
- take up a little slack;
- move a small amount of tape;
- tell you whether the hub turns freely.
It should not be used to:
- force a stuck reel;
- crank through an entire damaged cassette at warp speed;
- overcome obvious resistance.
If the tape feels like it does not want to move, believe it.
Sometimes the tape isn't the problem. The machine is.
This may be the single most important thing casual cassette collectors should understand.
A cassette deck that powers on is not necessarily a cassette deck that works properly.
Old decks contain their own collection of aging parts:
- belts;
- idlers;
- pinch rollers;
- motors;
- lubricants;
- switches;
- gears;
- electronic components;
- tape guides;
- heads.
Some belts turn into goo.
Some stretch.
Some pinch rollers harden.
Some mechanisms lose enough take-up torque that the tape begins piling up inside the machine.
And suddenly you're staring at the familiar horror show of tape spilling out of a cassette.
The deck has eaten it.
Again.
Some traditions really didn't need a revival.
Why cassettes get eaten
A cassette can get chewed up for several reasons, including:
- dirty or glazed pinch rollers;
- deteriorated belts;
- weak take-up mechanisms;
- idler problems;
- tape that has become excessively sticky or high-friction;
- damaged cassette shells;
- binding reels;
- poor tape guides;
- transport malfunctions.
CCI identifies shell deformation, damaged guides, degraded slip sheets, and problematic tape packs as potential causes of binding.
Historical preservation advice also repeatedly identifies poorly maintained tape transports as a major source of cassette damage.
So before blaming a 1983 Maxell, take a suspicious look at the 1983 cassette deck.
Test the deck before sacrificing anything important
Before I put an irreplaceable cassette into an unfamiliar deck, I test the machine using a cassette I would not mourn.
Something common.
Something replaceable.
Something whose destruction would generate roughly the emotional response of dropping a paperclip.
I want to confirm:
- Play works.
- Stop works.
- Eject works.
- Fast-forward works.
- Rewind works.
- The take-up reel turns consistently.
- The speed sounds stable.
- Nothing squeals or grinds.
- Tape is not accumulating around the capstan or pinch roller.
Let it play for a while.
Then inspect the test cassette.
If the machine can eat a $1 thrift-store cassette, it can also eat your only copy of SUMMER 87.
Choose the volunteer accordingly.
Clean the cassette deck
A healthy tape transport matters enormously.
Tape heads, capstans, guides, and pinch rollers accumulate contamination during use. Dirty components can degrade sound, increase friction, and contribute to poor tape handling.
Clean the heads
For a normal cassette deck, cleaning the playback/record head is straightforward.
CCI recommends a cotton swab moistened with 99% isopropyl alcohol for the head when cleaning is necessary. It specifically cautions against getting alcohol on rubber components.
Gently wipe the metal surface where the tape makes contact.
Do not soak anything.
Do not flood the transport.
And give everything time to dry before inserting a cassette.
Historical Sony maintenance instructions likewise recommended lightly moistened cleaning swabs for heads and tape-path components and warned users to wait until cleaned parts were dry before playback.
Clean the capstan
The capstan is the smooth metal shaft that controls tape speed.
It can also accumulate oxide and dirt.
Clean it carefully according to your deck manufacturer's instructions.
For many machines, isopropyl alcohol is appropriate for the metal capstan.
Be more careful with the pinch roller
This is the rubber wheel that presses the tape against the capstan.
And here's where the phrase “just clean everything with alcohol” becomes less useful.
CCI specifically recommends keeping the 99% isopropyl alcohol used on heads away from rubber parts and instead cleaning rubber with a cotton swab or microfiber cloth slightly moistened with water.
Some historical manufacturers did recommend alcohol on pinch rollers for particular machines, while others specified dedicated cleaning solutions.
So my normal-person recommendation is:
Follow your deck's service or owner's manual for the pinch roller.
If you do not have model-specific instructions, use the conservative approach rather than treating every piece of 40-year-old rubber like a laboratory countertop.
Cotton swabs are fine—with one caveat
Cotton swabs are widely recommended in manufacturer and preservation guidance.
Just make sure they don't leave fibers behind.
CCI specifically warns to check the transport after cleaning for stray lint.
A bright flashlight is your friend here.
What about cassette cleaning tapes?
Those little cleaning cassettes certainly existed, and manufacturers often sold them.
They can provide basic maintenance, particularly in machines where manual access to the heads is difficult.
But when I can reach the tape path safely, I prefer direct visual cleaning.
Why?
Because I can actually see:
- what is dirty;
- what I'm cleaning;
- whether debris is coming off;
- whether the pinch roller looks hardened or damaged;
- whether something is mechanically wrong.
A cleaning cassette cannot diagnose a bad belt.
Technology has limits.
Head demagnetizing: necessary maintenance or audio folklore?
People who owned cassette decks in the 1980s may remember being told that tape heads needed periodic demagnetizing.
That advice was real.
Sony and other manufacturers historically recommended head demagnetization at scheduled usage intervals because residual magnetization in tape-path components could contribute to high-frequency loss or increased noise.
Does that mean every cassette collector today needs to immediately order a vintage demagnetizing wand?
No.
For a casual collector, the priorities are much clearer:
- Make sure the machine mechanically works.
- Keep the tape path clean.
- Make sure the heads and transport are properly aligned.
- Address obvious sound or transport problems.
- Demagnetize only if your equipment's documentation recommends it and you know how to use the tool correctly.
A demagnetizer itself creates a strong magnetic field.
Improper technique can cause problems rather than solve them.
So I would not make it the first piece of cassette-care equipment I buy.
It's legitimate maintenance.
It just isn't cassette holy water.
Can you clean the actual magnetic tape?
This question deserves caution because searching the internet will produce people doing things to magnetic tape that I would not volunteer my own recordings for.
Cleaning the cassette shell is one thing.
Cleaning the magnetic tape itself is another.
The magnetic coating contains the actual recording.
Aggressive wiping, inappropriate solvents, friction, contamination, or mishandling can remove or damage that coating.
CCI recommends professional specialized cleaning for heavily contaminated tapes or tapes affected by mold. For light debris confined to the exterior shell, it recommends removing debris before opening or playing the cassette.
For a casual collector, my rule would be:
Dust on the outside?
Clean it.
Fingerprints on the shell?
Clean them.
A little debris around the cassette opening?
Carefully remove it without dragging or rubbing the tape.
Dirt actually embedded on the magnetic tape?
Stop improvising.
Sticky residue, mold, or mysterious deposits on the tape?
Definitely stop improvising.
And I would not run valuable magnetic tape through an alcohol-soaked cloth because someone on YouTube had good luck once.
Cleaning the cassette shell
Thankfully, the outside is easy.
For normal grime:
- Remove the cassette from its case.
- Use a clean, dry microfiber cloth first.
- If necessary, use a barely damp cloth on bare plastic areas.
- Keep moisture away from tape openings.
- Avoid saturating seams.
- Do not soak paper labels.
- Avoid aggressive solvents.
Be especially careful around printed labels and old adhesives.
What works beautifully on bare plastic can turn a 1982 paper label into modern abstract art.
The clear cassette case can usually be cleaned similarly.
And if the case is cracked beyond usefulness?
Replace it.
A generic plastic case is expendable.
The original J-card inside it often isn't.
Mold is not a “play it and see” problem
Mold deserves a different level of caution.
CCI describes mold on tape as fuzzy or thread-like growth that may appear black, brown, yellow, or other colors. It recommends professional cleaning for mold-contaminated audiotapes.
Mold is bad for several reasons.
It can affect:
- the tape surface;
- the shell;
- the paper insert;
- playback equipment;
- nearby media;
- the room where you're working.
A moldy tape can transfer contamination into your cassette deck.
Then the next cassette gets to enjoy the experience too.
So:
Do not casually play a moldy cassette.
Isolate it from the rest of the collection.
Do not blow compressed air through it.
Do not aggressively brush it in your listening room.
Do not open a heavily contaminated cassette just to “see what's going on.”
For an irreplaceable recording, talk to someone experienced in audiovisual preservation.
CCI is particularly direct on this point: if a cassette appears mold-infested, qualified professional treatment is preferable, and even some tape restorers will not accept moldy cassettes.
For a commercially released cassette you can replace for $4?
Sometimes the preservation strategy is called buy another copy.
Not everything has to become a conservation project.
Sticky-shed syndrome: yes, it exists. No, every cassette does not have it.
“Sticky shed” has become one of those magnetic-tape terms that gets applied to almost anything behaving badly.
Actual sticky-shed syndrome involves deterioration of the binder holding magnetic particles to the tape base.
When certain polyurethane binders absorb moisture and chemically break down, the tape can become sticky and shed material during playback.
Typical symptoms can include:
- squealing;
- increased friction;
- slowing or stopping;
- gummy deposits on heads and guides;
- magnetic material shedding from the tape.
The Library of Congress and NEDCC both document sticky-shed as a genuine binder deterioration problem.
But here's an important cassette-specific detail:
Sticky-shed is much more strongly associated with certain reel-to-reel tape formulations than with ordinary compact cassettes.
CCI states that binder degradation is more likely in reel tape than cassette tape and that the polyester base normally used in cassettes is generally chemically stable under normal storage conditions.
That does not mean cassette tape cannot deteriorate.
It means:
Don't diagnose every squeal as sticky-shed syndrome.
A cassette may squeal because of:
- shell friction;
- lubricant problems;
- a damaged pressure pad;
- transport problems;
- tape deformation;
- contamination;
- binder deterioration.
Similar symptoms can have different causes.
Which brings us to...
If a cassette starts squealing, stop
A cassette should not sound like a mouse filing a formal complaint.
If playback produces obvious squealing, binding, slowing, or unstable movement, I stop the machine.
Continuing to play may:
- damage the tape;
- increase friction;
- deposit material on the heads;
- worsen an existing mechanical problem.
CCI specifically recommends close monitoring during playback and cleaning the tape path after playing material that shows shedding or squealing.
Do not assume:
Maybe it'll work itself out.
It might.
It might also turn a recoverable problem into a broken tape.
Please do not bake your cassette
Tape “baking” is real.
The Library of Congress has studied controlled heating of sticky magnetic tapes, including the physical effects of heating around 54°C/130°F in some treatment contexts.
Professional preservation specialists sometimes use carefully controlled heat treatment to temporarily improve the playability of particular tape formulations affected by binder hydrolysis.
Notice the words:
- carefully;
- controlled;
- particular formulations;
- temporarily;
- professional.
What this does not mean is:
Put your childhood mixtape in the kitchen oven.
CCI specifically notes that baking is used much more commonly with deteriorated reel tapes than ordinary cassette audiotapes.
It is a specialized recovery procedure intended to get a damaged recording through a successful transfer.
It is not cassette rejuvenation.
Your Best of Summer '89 tape does not need 25 minutes at 200°F.
Broken tape can sometimes be repaired
Magnetic tape can physically break.
Leaders and splices can also fail.
This is not automatically the end of the recording.
Tape repair normally involves joining tape using proper audio splicing tape, which is designed for the purpose and applied so it does not interfere with the tape path.
A repair may result in losing a very small amount of recorded material at the break.
That's usually better than losing the entire cassette.
What I would not use:
household Scotch tape.
Household adhesive tape is thicker, ages unpredictably, can ooze adhesive, and was not designed to travel across a cassette transport.
NEDCC's preservation glossary specifically defines a proper splice as tape or film ends joined with specially formulated splicing tape.
For a $3 commercial cassette, learning to make a clean splice may be an enjoyable little repair project.
For the only recording of your grandmother telling family stories?
Different decision.
Cracked shell? The recording may still be fine.
This is one of the most reassuring cassette facts.
The plastic shell is not the recording.
If the shell cracks, warps, binds, or suffers guide damage, the tape inside may still be perfectly usable.
CCI explicitly recommends transferring tape into a replacement cassette shell in several situations, including broken shells, failed leader splices, and shell-related binding.
This is called reshelling.
Some cassette shells are held together with screws.
Those are comparatively friendly.
Others are ultrasonically welded or otherwise permanently joined.
Those require more careful opening and substantially increase the chance of turning a simple repair into a Saturday afternoon full of tiny plastic fragments and regrettable language.
If reshelling:
- keep the reels in the proper orientation;
- preserve the tape path;
- avoid twisting the tape;
- keep track of pressure pads and guides;
- use a good donor shell;
- do not contaminate the tape.
It's absolutely possible.
It is not quite the same as swapping batteries in a remote.
Tape packs should look boring
Good tape winding is not visually exciting.
That's what we want.
IASA stresses that cassette tape should be stored with a flat, even tape pack. Stepped winds can deform tape edges over time.
So look through the cassette window.
A healthy pack generally looks:
- smooth;
- flat;
- even;
- centered;
- free of loops and protruding strands.
A questionable pack may look:
- stepped;
- loose;
- unusually tight;
- coned;
- uneven at the edges.
CCI notes that badly wound cassettes may jam and should be monitored carefully if played.
The goal is not perfect geometric beauty.
The goal is that the tape isn't trying to escape.
How to store cassette tapes at home
This is where archival recommendations can accidentally make normal collectors think they need to buy a refrigerated vault.
You don't.
Institutional archives use controlled temperature and humidity because lower temperatures and carefully managed relative humidity can significantly extend the useful life of magnetic tape. CCI gives a broad magnetic-tape storage range of roughly 8–23°C with 15–50% relative humidity, with cooler and drier conditions within that range providing greater longevity.
That is useful science.
For most of us, the translation is much simpler:
Good places
- an interior room;
- a bedroom;
- an office;
- a finished living space;
- climate-controlled shelving;
- somewhere with reasonably stable temperature and humidity.
Bad places
- attic;
- hot garage;
- damp basement;
- shed;
- windowsill;
- radiator shelf;
- next to a heating vent;
- inside a car.
CCI specifically recommends avoiding attics, basements, direct sunlight, heating sources, and large temperature fluctuations for recording media.
So no, you do not need to transform the guest bedroom into Iron Mountain.
Just stop storing magnetic tape in places where humans would complain about the climate.
Store cassettes upright and in their cases
Cases do more than keep cassette collections looking tidy.
They protect tapes from:
- dust;
- dirt;
- impact;
- light;
- scratches;
- accidental pressure;
- damage to labels and J-cards.
CCI recommends storing magnetic cassettes upright and inside protective containers.
So yes:
Vertical, in the case, on a decent shelf is a perfectly sensible home-storage plan.
No giant loose cassette pile.
No rubber-banded stack.
No 47 tapes rattling around in a milk crate without cases.
Your teenage bedroom got away with that because the tapes were new.
We have additional information now.
The car was terrible cassette storage
This deserves acknowledgment because cassette culture and automobiles were inseparable.
We stored tapes:
- in glove compartments;
- in center consoles;
- under seats;
- on dashboards;
- in those enormous cassette cases that looked like tiny briefcases for extremely low-level espionage.
It felt normal.
It was also terrible preservation practice.
Cars subject cassette tapes to:
- extreme heat;
- intense sunlight;
- rapid temperature cycling;
- dust;
- dirt;
- vibration.
Heat accelerates chemical deterioration and can affect lubricants and tape pack tension. CCI specifically advises against warm storage and direct sunlight for magnetic media.
A cassette surviving fifteen summers in a Pontiac does not mean the Pontiac was archival storage.
It means the cassette won.
Humidity matters too
High humidity is particularly bad news for magnetic tape.
CCI notes that elevated relative humidity can accelerate binder hydrolysis, promote mold, encourage layers of wound tape to adhere to one another, and affect tape-pack tension. Very low humidity can also alter tension and contribute to wrinkling or mechanical problems.
Again, normal-person translation:
Don't obsess over maintaining a laboratory-grade percentage.
Instead:
- avoid damp rooms;
- avoid recurring condensation;
- fix basement humidity problems;
- don't put tapes against wet exterior walls;
- don't store them where the climate swings dramatically.
Stable and boring wins.
Cassette preservation is not supposed to be exciting.
Magnets: how worried should I actually be?
Yes, magnetic tape can be affected by sufficiently strong magnetic fields.
That's how recording works in the first place.
But online cassette advice occasionally makes it sound as if placing a tape within visual range of an appliance will immediately erase side two.
That is not reality.
CCI recommends keeping magnetic tapes separated from significant magnetic sources and notes that a distance of roughly three inches is enough protection from many magnetic fields encountered in ordinary situations. It specifically mentions sources such as loudspeakers, demagnetizers, and electric drills.
So I would avoid storing your tapes:
- directly on a big speaker;
- beside strong permanent magnets;
- next to motors or transformers;
- next to a powered tape-head demagnetizer.
I would not panic because a cassette has been in the same room as a refrigerator.
Magnetic preservation deserves respect.
Not superstition.
Should tapes be fully rewound for storage?
There is less value in creating an absolute “side A must always face this way” rule than cassette collectors sometimes suggest.
What matters more is the quality of the tape pack.
IASA emphasizes a flat, even wind.
CCI's audio-tape bulletin makes an interesting recommendation for storage after playback: it says not to automatically rewind the tape back to the beginning after play because fast rewinding can create popped strands and poor long-term pack geometry.
That guidance is more nuanced than the old household rule of “always rewind your tapes before putting them away.”
For normal collectors, I would focus on this:
Store the cassette with the tape neatly and evenly wound.
I care much less about which end of the program is facing outward than whether the tape pack looks healthy.
Do I need to “exercise” my cassettes?
There is old advice saying cassette tapes should periodically be fast-forwarded and rewound to keep them healthy.
I would not build a recurring weekend ritual around it.
CCI's broader guidance on wound magnetic tape says that if a tape is properly wound, has been stored in reasonable conditions, and shows no visible winding problem, it is better to leave it alone rather than rewinding unnecessarily.
That makes sense.
Every transport cycle introduces:
- friction;
- tension;
- loading and unloading;
- mechanical risk;
- another opportunity for a failing deck to misbehave.
If a tape pack looks poor, intervention can be useful.
If it looks fine?
You do not have to give it cardio.
Does playing a cassette wear it out?
Technically, every mechanical interaction creates some wear.
But the idea that an old cassette becomes dramatically worse every time you play it is too simplistic.
IASA notes that cassette loading, unloading, poor tension, and malfunctioning transport mechanisms can create significant mechanical stress.
The practical lesson is much more useful than counting plays:
Playing the tape isn't the enemy. Playing it in a bad machine might be.
A clean, well-maintained cassette deck handling a healthy tape correctly is very different from a crusty thrift-store boombox whose belts have the structural integrity of overcooked linguine.
Type I, II, III, and IV: the short version
Cassette manufacturers developed several standard tape types with different magnetic formulations and playback/recording characteristics.
You do not need a chemistry degree to recognize the basic categories.
Type I — Normal / Ferric
The most common cassette type.
These generally used ferric oxide magnetic material and were widely used for commercial prerecorded tapes, blank tapes, voice recordings, mixtapes, and everything else.
Type II — High Bias / Chrome or Cobalt
Often called “chrome” tapes, although later Type II formulations frequently used cobalt-modified materials rather than literal chromium dioxide.
They offered improved high-frequency performance and lower noise with compatible decks.
Type III — Ferrichrome
An uncommon hybrid formulation combining properties associated with ferric and chrome-style layers.
You may encounter one.
You probably won't encounter many.
Type IV — Metal
Metal-particle formulations offered higher performance and could handle stronger recording levels.
They were more expensive and required compatible recorders for proper recording.
Many later cassette decks detect tape type automatically using physical notches in the cassette shell. IASA documents this automatic identification and notes that some machines instead require the user to select the correct setting manually.
Using the wrong playback EQ may make a cassette sound too bright, dull, or otherwise incorrect.
That does not automatically mean the tape has been damaged.
For preservation purposes, the fundamentals remain similar:
Keep them clean, cool, dry, properly wound, and away from bad machinery.
Commercial cassette or unique recording? That changes the stakes.
I treat a $3 copy of a commercially released album differently from the only recording of someone's wedding.
Not because the commercial cassette doesn't matter.
Because one is replaceable.
The other may not be.
Unique tapes include:
- mixtapes;
- family recordings;
- answering-machine messages;
- local-band demos;
- rehearsals;
- live concerts;
- radio recordings;
- interviews;
- home recordings;
- voice letters.
The threshold for stopping and asking an expert should be much lower with those.
If my easily replaceable cassette of a major-label album needs an adventurous reshell?
Fine.
If a tape labeled DAD'S BAND – 1987 starts squealing?
We're done experimenting.
The mixtape problem
A mixtape is a good example of why “the music is available online” doesn't necessarily solve the preservation problem.
Sure, the songs may still exist.
But the tape also contains:
- the exact sequence;
- edits;
- pauses;
- crossfades;
- radio announcers;
- DJ chatter;
- messages;
- accidental recording errors;
- handwritten notes;
- the J-card;
- somebody's extremely confident choice to put Journey immediately after Depeche Mode.
You can recreate the song list as a streaming playlist.
You cannot recreate the exact object.
The recording itself has history.
The handwriting has history.
The weird transition between tracks has history.
That's enough reason to take an old mixtape seriously without pretending every cassette was a sacred cultural artifact.
Some were sacred.
Some contained the radio edit of “We Built This City” six times because somebody kept missing the first ten seconds.
History is complicated.
J-cards and labels deserve care too
When we talk about cassette preservation, it is easy to focus entirely on the magnetic tape.
Collectors care about the package too.
Original J-cards can contain:
- artwork;
- lyrics;
- credits;
- catalog information;
- handwriting;
- dates;
- personal notes;
- track listings.
Paper is vulnerable to:
- sunlight;
- moisture;
- fading;
- mold;
- torn folds;
- adhesive damage.
I keep original paper dry and out of direct sunlight.
I do not clean vintage J-cards with liquid.
If a plastic cassette case breaks, I replace the case and transfer the original paper.
CCI's digitization guidance also recommends preserving associated written information and scanning cassette inserts or notes when they contain contextual information about important recordings.
That's especially smart for one-of-a-kind tapes.
Don't store your cassette collection on the floor
This is not sophisticated preservation science.
It's just good disaster planning.
Keep collections a little above floor level where practical.
Because houses contain:
- plumbing;
- water heaters;
- washing machines;
- sump pumps;
- overflowing sinks;
- occasionally spectacularly stupid human behavior involving beverages.
A few inches of elevation can make the difference between:
That leak was annoying.
and:
My entire cassette collection is wet.
Which leads to...
If a cassette gets wet
Do not immediately:
- play it;
- rewind it;
- fast-forward it;
- pull the tape out;
- put it in a freezer;
- submerge it again to “rinse it.”
NEDCC specifically advises not rewinding wet or damaged magnetic tape and warns that taking apart or unwinding submerged tapes without expert guidance can cause more damage.
For an irreplaceable tape:
Isolate it and get professional advice.
For a common commercial tape:
Replacement may be safer, easier, and cheaper than recovery.
Preservation occasionally means knowing when not to become MacGyver.
Should I digitize my cassette tapes?
For anything irreplaceable?
Yes.
Not because your tapes are scheduled to self-destruct next Thursday.
Because preserving a cassette and preserving access to its recording are two different jobs.
CCI identifies two long-term threats to analog tape collections:
- the tape itself ages;
- good playback machines are becoming increasingly scarce.
Its audio preservation guidance recommends migrating important analog recordings to digital formats while capable playback equipment is still available.
IASA has made the same concern explicit through its Magnetic Tape Alert Project: magnetic-tape playback equipment is disappearing.
This is important.
You can store a cassette beautifully for another thirty years and still reach a point where finding a properly working deck becomes the harder part.
Digitization preserves access to the sound.
The physical cassette may still matter because it holds:
- artwork;
- handwriting;
- packaging;
- provenance;
- memories;
- the original carrier.
Digitizing it does not mean throwing it away.
I would keep both.
What should I digitize first?
If you have hundreds of tapes, don't start alphabetically.
Start with what you cannot replace.
My priority order would be:
- Unique family recordings
- Home recordings
- Local bands, rehearsals, and demos
- Live recordings with no known alternate source
- Personally important mixtapes
- Rare or out-of-print material
- Tapes showing early signs of deterioration
- Commercial recordings that are easily replaceable
The tape containing somebody's voice is more urgent than a commercially released album you can buy again for six bucks.
Even if the album has cooler cover art.
DIY cassette digitization: the very short version
A decent home cassette transfer requires:
- a functioning cassette deck;
- a clean tape path;
- correct tape-type and playback settings;
- suitable audio output from the deck;
- an audio interface or recorder;
- recording software or a digital recorder;
- an uncompressed capture format.
CCI's preservation guidance recommends uncompressed WAV or Broadcast Wave files for preservation masters rather than compressed formats such as MP3.
For home use, I would capture a good-quality WAV master, keep at least two copies in different locations, and create compressed copies for everyday listening.
That is enough for this article.
Because cassette digitization deserves its own guide.
The deck may be more endangered than the cassette
There is a strange possibility with magnetic tape preservation:
The cassette may survive longer than our ability to conveniently play it.
Good cassette decks are aging too.
Potential failure points include:
- belts;
- idlers;
- rubber rollers;
- motors;
- lubricants;
- capacitors;
- relays;
- switches;
- playback heads;
- alignment.
CCI notes that excellent-quality cassette players largely disappeared from production decades ago and identifies dwindling playback hardware as a major reason important tape recordings should be digitized.
This does not mean everybody needs to hoard twelve vintage Nakamichis in the basement.
It means:
If you own irreplaceable recordings, don't assume a working cassette deck will always be a $25 Craigslist purchase away.
Buying used cassettes: what I check
I'm not performing an archival inspection at a garage sale.
I am, however, looking at a few things.
Shell
Is it cracked or warped?
Pressure pad
Still there?
Tape pack
Flat and reasonably even?
Visible tape
Wrinkled? Folded? Hanging out?
Mold
Any fuzzy growth or obvious moisture damage?
Case
Cracked is fine. Missing is annoying. Replacement cases are easy.
J-card
Present? Water-damaged? Moldy? Sun-faded into another dimension?
Heat deformation
Does the cassette look like it spent several summers on the dashboard of a Buick?
That is not automatically a deal-breaker for a cheap commercial cassette.
It is simply information.
The garage-sale cassette box
This is probably my favorite cassette buying scenario.
There's a plastic storage case sitting under a folding table at a garage sale.
Inside:
- three commercial albums;
- four mixtapes;
- two blank Maxells;
- a church recording;
- something labeled SUMMER 87;
- another cassette with no label at all;
- one specimen that clearly lived in a car long enough to qualify for residency.
Here's what gets my attention.
The scratched cases?
Don't care much.
Yellowing plastic?
Mostly cosmetic.
A faded J-card?
Not ideal, but unsurprising.
A missing pressure pad?
That cassette goes into the do not play yet pile.
A warped shell?
Same.
Loose tape hanging out?
Caution.
Visible mold?
Absolutely not going into my deck.
A mystery handwritten cassette?
Now you've got me.
Not because every mystery tape contains lost musical history.
Most probably contain somebody recording three songs off the radio before getting distracted.
But occasionally these boxes contain recordings that exist nowhere else.
That's the fun part of physical media.
You don't always know what you found until you listen.
Just make sure the cassette and the machine are ready first.
What I would never do to an important cassette
If a recording matters to me, I would not:
- put it first into an unknown vintage deck;
- force a jammed hub;
- spray cleaner into the cassette shell;
- soak the magnetic tape in alcohol;
- play visible mold;
- keep running a tape that squeals;
- rewind aggressively just because someone said old tapes need “exercise”;
- repair the recording surface with household Scotch tape;
- bake the cassette in the kitchen;
- leave it in a hot car;
- experiment on it when a replaceable cassette would teach me the same lesson.
The tape has already survived forty years.
We do not need to personally become the event that ends it.
Cassette myths worth retiring
Myth: Every cassette is slowly erasing itself
Magnetic recordings do not simply fade into silence according to a predictable countdown.
IASA states that properly manufactured, stored, and handled magnetic tape can retain magnetic information for historically meaningful periods.
Chemical and mechanical deterioration are real.
Spontaneous magical erasure is not the main thing keeping preservation professionals awake.
Myth: You must rewind every cassette every few months
No.
If the tape pack is healthy and storage conditions are good, unnecessary winding can introduce more mechanical stress than benefit.
Myth: Any magnet anywhere near a cassette will erase it
Strong magnetic fields matter.
Your tape is not going to lose side B because somebody charged a phone in the same room.
Keep tapes away from strong magnets, speaker drivers, demagnetizers, motors, and similar concentrated sources.
Then continue living your life.
Myth: Playing old cassette tapes quickly wears them out
A healthy tape in a healthy machine can be played.
The much bigger danger is mechanical mishandling from a bad transport.
Myth: If it squeals, keep playing it until it loosens up
No.
Stop.
Diagnose first.
Myth: Tape baking means “put it in an oven”
Absolutely not.
Myth: A broken shell means the recording is gone
Nope.
A reshell may save it.
The tape and the cassette are not the same thing.
A five-minute cassette routine
When I bring home an old cassette, this is enough.
- Look at the shell.
No major cracks, warping, or separation.
- Check the pressure pad.
Make sure it is present and not obviously deteriorating.
- Inspect the tape pack.
Look for a reasonably flat, even wind.
- Check for contamination.
Mold, water damage, sticky deposits, or protruding tape are stop signs.
- Clean the exterior.
Keep liquids away from openings and paper.
- Use a known-good deck.
If you're unsure, test the machine with a disposable cassette first.
- Start playback cautiously.
Watch and listen for the first minute.
- Stop if anything behaves strangely.
Squeal, binding, slowing, wrinkling, or tape spilling out is not background ambience.
- Digitize anything unique.
- Put it back in its case and store it upright indoors.
That's most cassette preservation for normal people.
No lab coat required.
If you remember only seven things
1. Keep cassette tapes indoors
Cool, dry, stable living conditions beat attics, garages, damp basements, and cars.
2. Store them upright in their cases
The case protects the cassette and the paper around it.
3. Look before you play
Check the shell, pad, tape, and tape pack.
4. Take care of the deck
A poorly maintained cassette machine can destroy a perfectly healthy cassette.
5. Stop when a tape squeals or binds
Do not try to power through.
6. Isolate mold
Do not play moldy tape or introduce it into your normal cassette deck.
7. Digitize what cannot be replaced
The physical cassette can stay.
The recording deserves another way to survive.
Quick Reference: Cassette Care
| Situation | What I Would Do | |---|---| | Normal commercial cassette in good condition | Play on a tested, clean deck | | Dusty shell | Wipe exterior gently | | Missing pressure pad | Repair or reshell before normal playback | | Cracked/warped shell | Reshell before playback | | Poor or stepped tape pack | Investigate before playing; avoid unnecessary aggressive winding | | Small amount of tape slack | Gently take it up manually if the hub moves freely | | Hub resists turning | Stop; do not force | | Tape squeals | Stop playback | | Visible mold | Isolate and do not play | | Wet cassette | Do not rewind or play | | Broken tape | Proper splice or professional repair | | Irreplaceable home recording | Digitize as soon as practical | | Unknown vintage deck | Test with a disposable cassette first | | Hot attic/garage/car storage | Move the tapes indoors | | Strong magnet or speaker directly beside tapes | Move the tapes away | | Healthy tape stored well | Leave it alone rather than constantly “exercising” it |
Before You Play a 40-Year-Old Tape
- [ ] Check the cassette shell for cracks or warping.
- [ ] Make sure the pressure pad is present and stable.
- [ ] Look through the window for an even tape pack.
- [ ] Check the exposed tape for wrinkles, folds, or deposits.
- [ ] Look for signs of mold or water damage.
- [ ] Gently take up obvious slack only if the hubs move freely.
- [ ] Do not force a stuck hub.
- [ ] Make sure the cassette deck is clean.
- [ ] Test an unfamiliar deck with a replaceable cassette first.
- [ ] Confirm play, stop, rewind, fast-forward, and take-up work normally.
- [ ] Start playback while watching the cassette closely.
- [ ] Stop immediately if the tape squeals, slows, binds, or spills.
- [ ] Digitize the recording if losing it would actually hurt.
Forty years later
I go back to the cassette I pulled from the box.
The case is scratched.
The J-card has faded.
The handwriting is unmistakably mine, including the wildly optimistic belief that squeezing one more song onto the end of side A would somehow work out.
I inspect the shell.
The pressure pad is there.
The tape pack looks good.
The deck has already passed its sacrificial-cassette test.
So I press Play.
There's a little hiss.
One channel may be slightly lower than the other.
The recording is not perfect.
Of course it isn't.
Cassettes were never perfect.
They hissed. They jammed. They stretched. They relied on little rubber wheels and tiny belts and periodically retaliated by wrapping our favorite album around a capstan.
And somehow this little mechanical object has carried music across four decades and can still give it back.
That seems worth taking care of.
I know considerably more now than I did when I tossed cassettes into the back seat of a car.
So perhaps the least I can do is give them a better shot at the next forty years.
Sources & Further Reading
- Canadian Conservation Institute — The Digitization of Audio Tapes, Technical Bulletin 30
- Canadian Conservation Institute — Caring for Audio, Video and Data Recording Media
- Canadian Conservation Institute — Video and Audio Recordings FAQ
- International Association of Sound and Audiovisual Archives — TC-05 Magnetic Carriers
- International Association of Sound and Audiovisual Archives — Components of Magnetic Tapes and Their Stability
- Library of Congress — Care, Handling, and Storage of Audio Visual Materials
- Library of Congress — Sticky-Shed Syndrome Research
- Northeast Document Conservation Center — Fundamentals of AV Preservation
- IASA — Magnetic Tape Alert Project
- Mixtape Museum — Tips on Preserving Audio Cassette Tapes